چگونه وردپرس را به صورت لوکال نصب کنیم ؟
Before starting off with how to install WordPress locally, let us begin with what it means to install something locally. A local installation means to perform a software installation on your local computer. As simple as that. Every time an installer program is opened, you need to select its destination. On opening it, you will be given a choice of saving it either in the hard disk or the directory. Now, if you choose to install it on the external hard drive, it will still be taken as a local install only for the reason that it is performed on your local computer. But if you want to install it on WordPress hosting instead, click here.
What are the advantages of installing WordPress locally?
Installing WordPress locally is as much a delight for a businessman as for a techie. After choosing a WordPress hosting for your website, if you plan to perform install operation for WordPress locally, you will have the following advantages over others:
1. Faster response and speed time for page loading
2. Easy access to work results
3. Easy to restart the server in case of an error
4. Option to check your work multiple times before putting it live
Before installing WordPress locally, allow us to give you a brief overview of the stages that are involved while carrying out this operation. Also, ensure that you have at least PHP version 4.3+ and MySQL database server version 4+.
The stages to install WordPress locally are as follows:
1. Downloading and installing a WAMP/XAMPP server
2. WAMP/XAMPP activation
3. Downloading and Installing WordPress
4. Configurations
5. Filling out your details
1. Downloading and Installing a WAMP/XAMPP server
As a PC user, installing a WAMP (Windows Apache MySQL and PHP) server or a XAMPP (Cross-platform Apache MySQL PHP and Pearl) is a must. These servers give you ample of space. In case you don’t have either, download and install them before you go ahead.
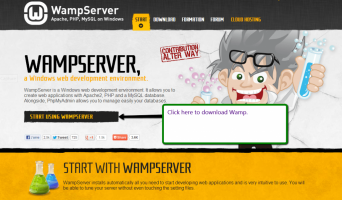
2. Activating WAMP / XAMPP
After installing WAMP/ XAMPP activate the server by clicking on the control panel application. Here you can see Apache and MySQL options.The green mark next to them indicates that it is running properly. The process is the same for WAMP as well.
3. Downloading and Installing WordPress
Once XAMPP/WAMP is set on your system, install WordPress from wordpress.org for its latest version. After installing the same, go to the location where you have downloaded WordPress and follow these steps:
Step 1– Go to the file location and copy ‘Wordpress’ zip file. Right click on it and select extract here. Create a new folder and rename it according to your convenience to store the extracted files.
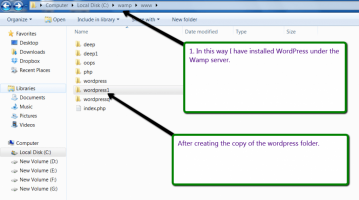
Step 2– Double-click on your browser and type ‘localhost/phpmyadmin’ inside your address bar. After pressing enter, it will show the following:
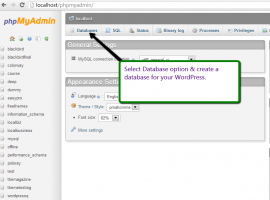
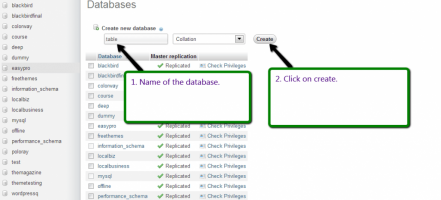
Step 3– In order to create your own database, select the database for your WordPress and click on the ‘create’ option to use it.
Step 4- Type ‘localhost’ inside your browser after finishing step 3 and select the folder that you had created. On finishing this action you will be pushed to the create configurations file page.
4. Configurations
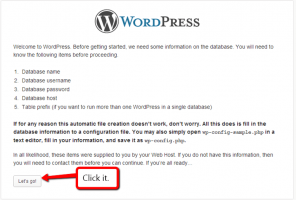
Click on the ‘create configuration file’ button followed by ‘lets go’. Now you are very close to putting your WordPress website on local hosting. This is what you will see after you reach the configurations page:
5. Fill in database connection and your own details
Database connection details include database name, username, password, database host and table prefix. Keep the database name same as your WordPress and the username should remain as root since it is a default for MySQL. Leave the other fields as they are. In case you have not used a password earlier leave it as it is as well.
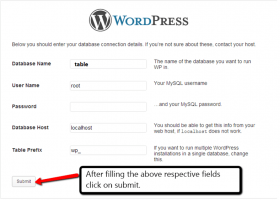
Other details like your email, name, and password can be filled. Once this is done, click on install WordPress and you are all set.
Installing WordPress locally is easy. You can also do the same for MAC. Just a word of caution: there is a difference between the installing the same for MAC and for XAMPP/ WAMP. Do go stepwise and if you face any difficulties while doing the same, let us know by asking about it in the comments section below. We will make sure your doubts and errors get rectified.