How to Automatically Forward Emails in Outlook and Gmail
Whether you need to forward select emails to another address or bulk forward all of your emails to another inbox, both Outlook and Gmail have easy set-it-and-forget-it methods to automate the process.
How to Automatically Forward Emails in Outlook
To automatically forward an email in Outlook, you’re going to need to create a rule:
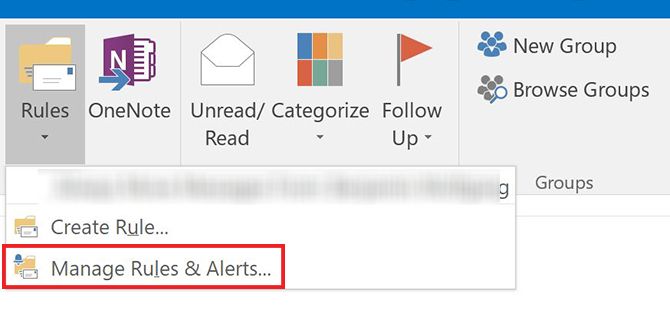
- Open Outlook and on the Home tab, click the arrow under Rules > Manage Rules & Alerts.
- Click New Rule.
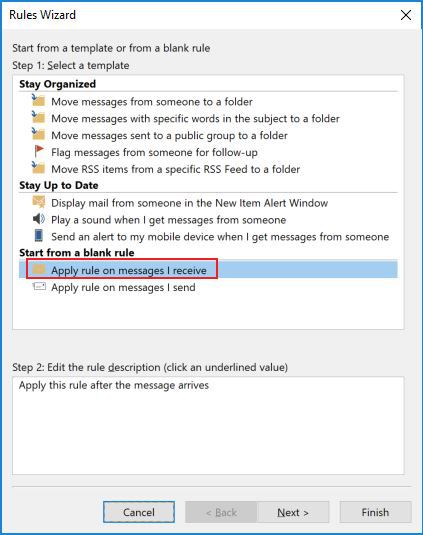
- Under Start from a blank rule, select Apply rule on messages I receive, and click Next.
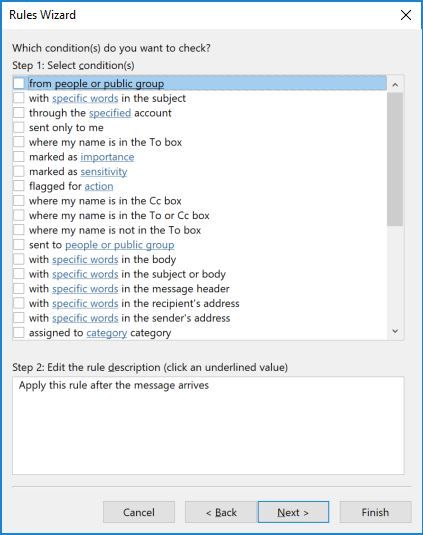
- Select the criteria for the kinds of messages you want to forward. If you want to forward every single email, leave these selections blank. Click Next.
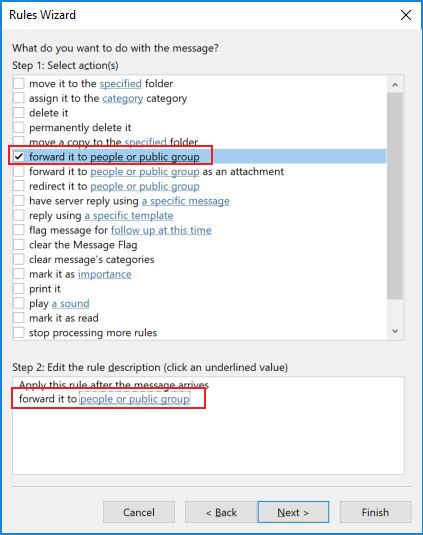
- In Step 1, select Forward to people or public group (or if you prefer, Forward to people or public group as an attachment.) In Step 2, click the link for people or public group.
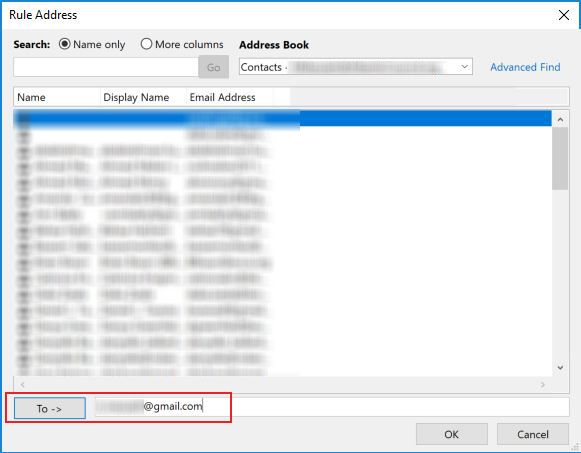
- Enter the email address(es) of the contact(s) you want to forward the email to.
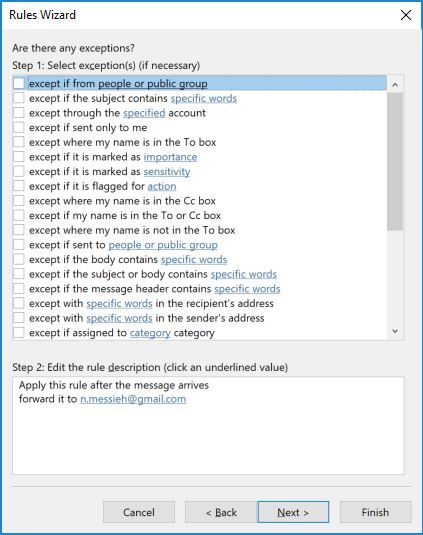
- Select the criteria (if any) for emails you want to exclude from this rule.
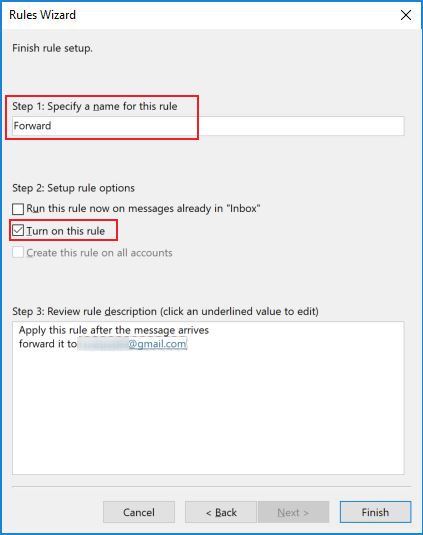
- Enter a name for your rule, make sure Turn on this rule is checked and click Finish.
Emails sent in this way will appear in the same way any other forward would, with the exception of the subject line.
To stop forwarding the emails, just go back to the Home tab, click Rules > Manage Rules & Alerts and uncheck the box next to the rule you want to disable.
How to Automatically Forward Emails in Gmail
To automatically forward emails in Gmail, it’s a similar process, with one fundamental difference. With Outlook, you don’t have to get someone’s permission to automatically forward emails to them. In Gmail on the other hand, if you want to add an email as a forwarding address, they have to grant you permission.
So the first step in automatically forwarding emails is to add those forwarding addresses:
- Go to your Gmail Settings and open the Forwarding and POP/IMAP tab.
- At the top of the page under the Forwarding subheading, click Add a forwarding address.
- In the window that pops up, enter the email address you want to forward emails to. (You can only enter one email address at a time) and click Next.
- Your contact will receive an email with a link they need to click in order to grant you permission to send forward them emails.
Now it’s time for you to set up the filter to automatically forward them emails:
- Go to your Gmail Settings and open the Filters and Blocked Addresses tab.
- Scroll down to the bottom of the page and click Create a New Filter.
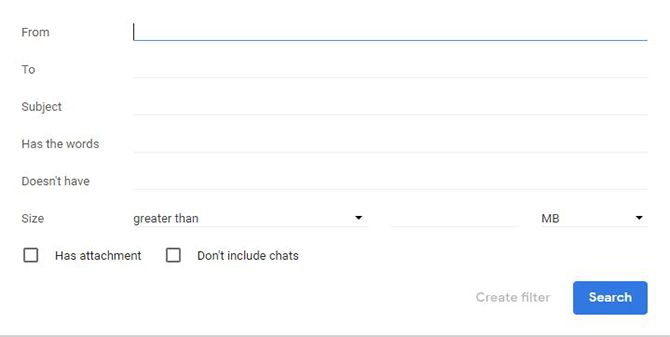
- Enter the criteria for the emails you want to forward. If you want to forward all of your emails, just enter your email address in the To field and click Create filter.
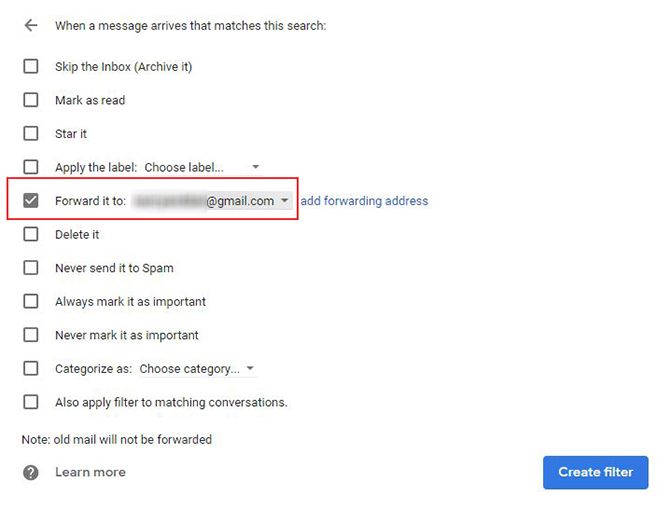
- Select Forward it to: and from the dropdown menu, select the address you want to forward the emails to, and click Create filter.
To stop forwarding emails, go back to Settings > Filters and Blocked Addresses and click delete next to the rule you want to get rid of.
There are plenty of other ways you can automate your email processes, from using mail merge for mass personalized emails, to sending email from Google Sheets using a script, to using Mozilla Thunderbird for scheduled emails and auto-responses.
ثبت دامنه، مدیریت سرور، لینوکس، امنیت، پشتیبانی


